Our Favorite Mappings For Perfect Lashes
The Best Eyelash Mappings for a Perfect Look
Choosing the right eyelash mapping is essential to enhance your eyes and achieve a harmonious result. Whether you want a natural, intense or sophisticated effect, there is a mapping adapted to each eye shape. Discover our four favorite mappings, designed to structure and magnify your eyes, while offering the possibility of a personalized effect according to your desires.
Our mappings are standard bases, but they can be adjusted for a more pronounced or more discreet effect. For example, a standard mapping in 10mm - 12mm - 14mm - 12mm - 10mm can be accentuated in 12mm - 14mm - 16mm - 14mm - 12mm for a more intense and sophisticated look. Each pose can be personalized by lengthening or reducing the lengths while respecting the structure of the mapping for a tailor-made rendering.
Why choose your eyelash mapping wisely?
Mapping is the key to successful eyelash extension application. It allows you to:
• Highlight the natural shape of the eyes
• Correct certain features such as drooping, too round or too small eyes
• Create a tailor-made effect, from the most natural to the most glamorous
• Ensure a harmonious and balanced result
A well-structured mapping makes all the difference between a simple extension and a magnified look.
Our 4 essential eyelash mappings
1. Classic doe eye
8mm - 10mm - 12mm - 10mm - 8mm
For small eyes – Opens and balances the look
This mapping is ideal for enlarging and illuminating the eyes without excessive effect. It is particularly suitable for small eyes by adding volume to the center for a more open effect.
More intense version: 10mm - 12mm - 14mm - 12mm - 10mm
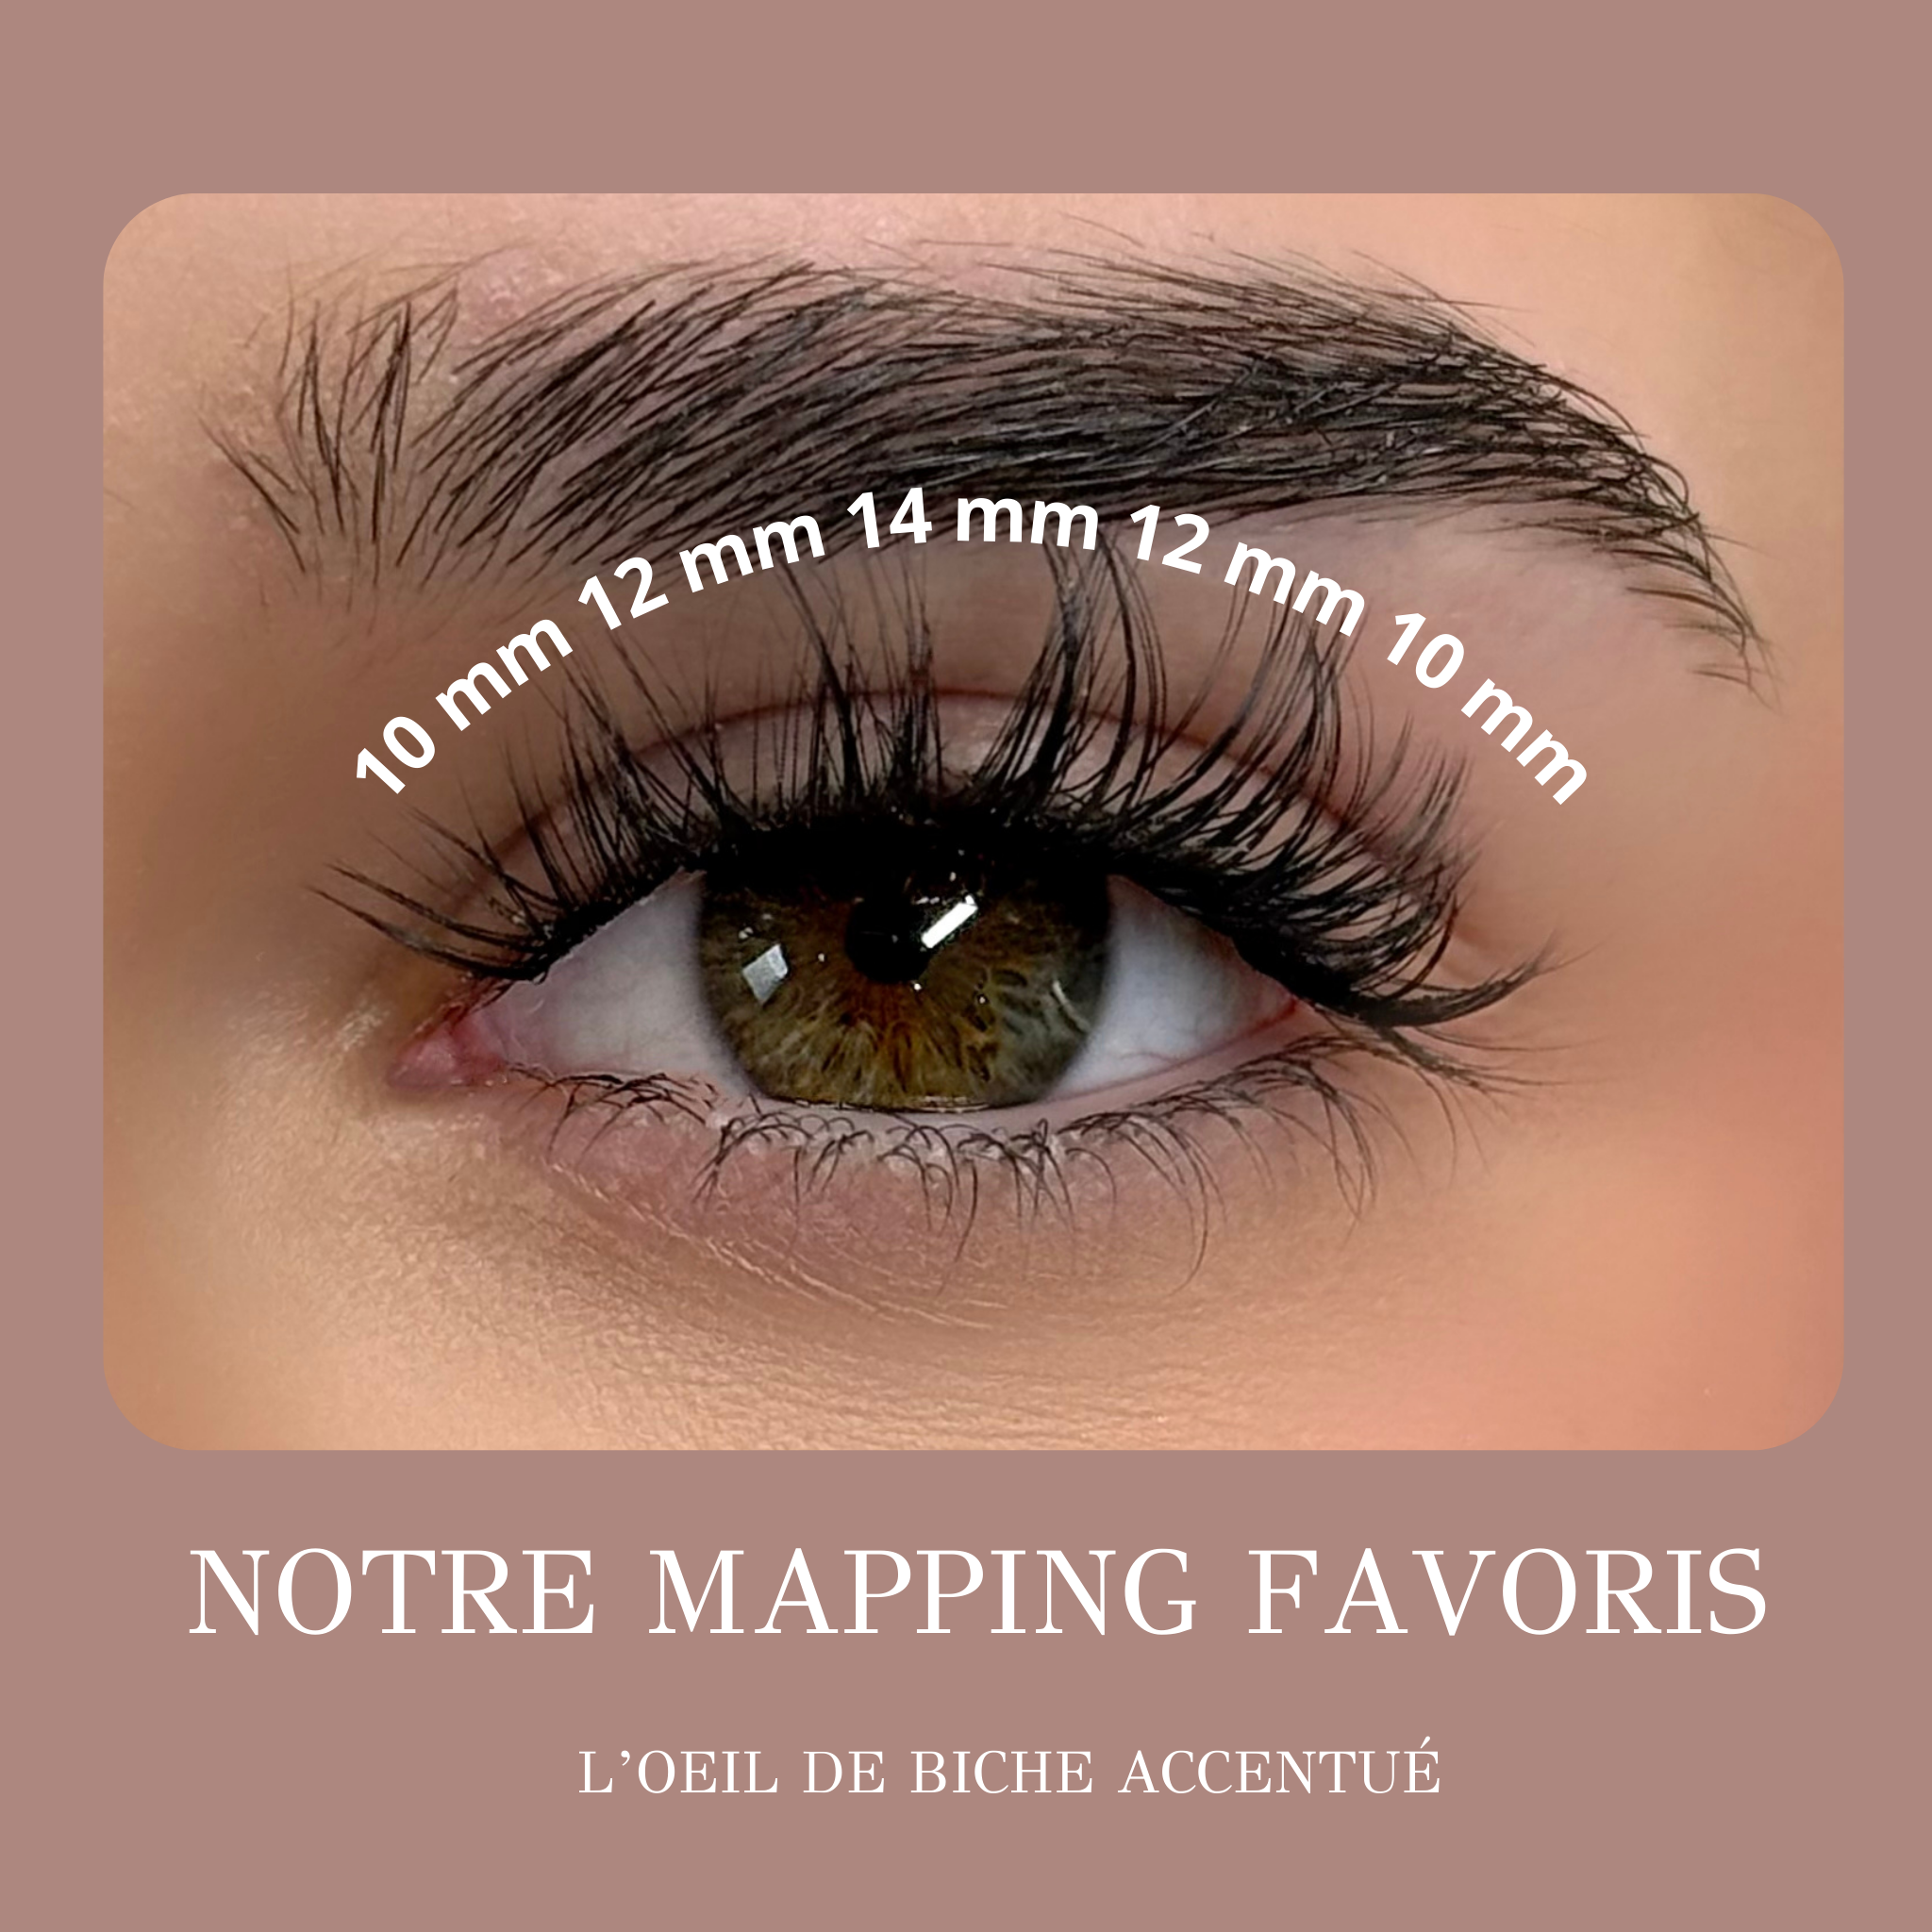
2. Accentuated doe eye
10mm - 12mm - 14mm - 12mm - 10mm
For round eyes – Lengthens and refines the look
This style structures the look by giving it a more elongated appearance, perfect for those who want a sophisticated effect without overdoing it.
More intense version: 12mm - 14mm - 16mm - 14mm - 12mm
3. Natural doe eye
8mm - 10mm - 12mm - 12mm - 10mm
For drooping eyes – Slightly lifts the gaze
If you are looking for a light and discreet effect, this mapping is ideal. It allows you to subtly enhance drooping eyes for a more awake and fresh look.
More intense version: 10mm - 12mm - 14mm - 14mm - 12mm
4. Structured doe eye
10mm - 12mm - 14mm - 12mm - 8mm
For Almond Eyes – Accentuates shape and adds depth
This mapping highlights the naturally elegant shape of almond eyes. It gives depth and a more worked effect.
More intense version: 12mm - 14mm - 16mm - 14mm - 10mm
How to apply these lash mappings
1. Prepare lashes: Clean and dry natural lashes before applying extensions.
2. Choose the right curvature: Adapt the curvature (C, D, M…) according to the desired effect.
3. Place the extensions according to the mapping: Respect the structure and the defined lengths.
4. Adjust if necessary: Check the balance and adapt the pose for a uniform result.
Custom eyelash mapping for a unique look
The choice of mapping depends on the shape of the eyes and the desired effect. For a first try, it is recommended to start with a standard mapping and gradually adjust the lengths for a more intense effect if necessary.
Each mapping can be personalized according to your desires, by increasing the lengths for a more spectacular look or by reducing them for a more discreet and natural result.
What is your favorite mapping? Share your opinion in the comments and discover our other tips for perfect lashes.